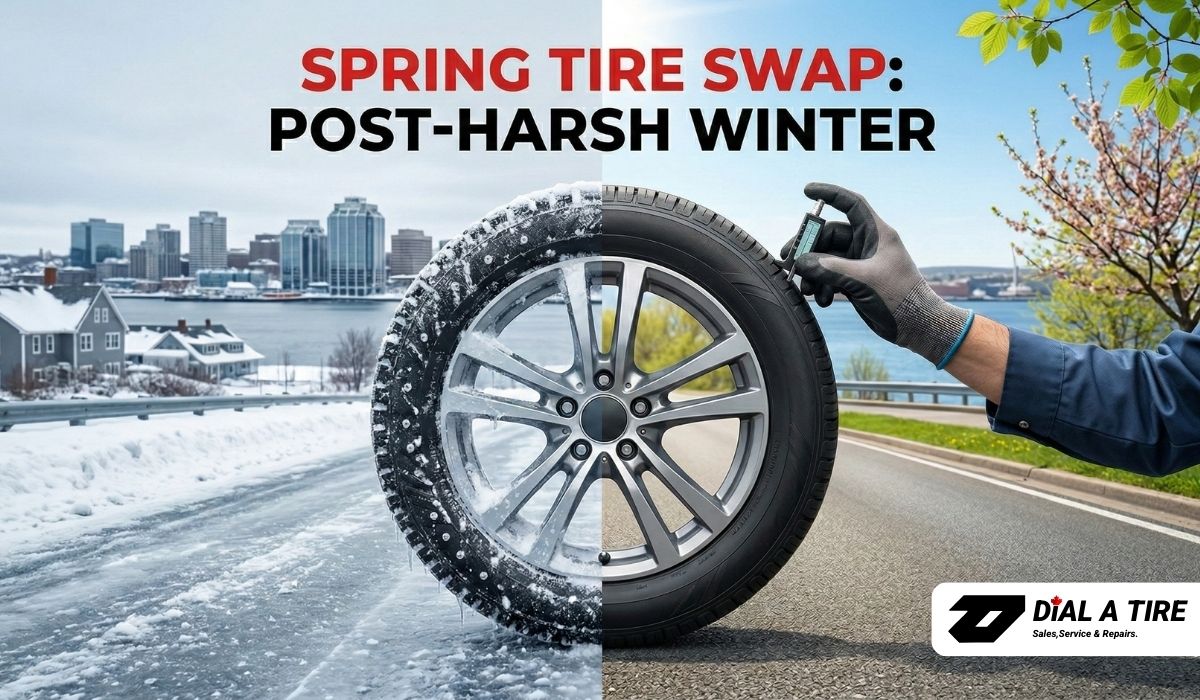
There’s a moment every spring, usually sometime in late April, when every Halifax driver collectively decides: “Okay. Winter’s done. Time to get these winter tires off.”
And then most people treat the spring changeover like swapping shoes: take one pair off, put the other on, done. Which would be fine if Halifax winters were gentle. They’re not.
Between the salt, the freeze-thaw potholes, the ice-covered speed bumps you didn’t see, and the general beating your car took from November to April, spring isn’t just tire-swap season. It’s damage inspection season. The stuff that happened under your car all winter doesn’t announce itself. It waits quietly until something wears out, pulls sideways, or makes a noise you can’t ignore at highway speed in June.
Here’s the checklist we run through at Dial-A-Tire every spring. You can use it whether you’re coming to us or doing the work yourself.
Part 1: The Winter Tires Coming Off
Before your winter tires go into storage, they deserve more than a glance. What you find now determines whether they’re ready for next October or whether you’re shopping for a new set in the fall.
Tread Depth The Honest Number, Not The Eyeball Test
Pull out a tread depth gauge and measure at multiple points across the tread face.
Here’s the thing people don’t realize: the legal minimum depth in Nova Scotia is above 1.6 mm (2/32″). But a winter tire at that depth has lost almost all of its winter capability. The siping those thousands of tiny slits that create bite on ice and snow needs depth to function. Once you’re below about 4/32″ (roughly 4 mm), a winter tire is technically legal but practically compromised.
Our rule of thumb: If your winter tires are at or below 4/32″ when they come off this spring, plan on replacing them before next season. Don’t wait until October when everyone else is scrambling to buy them in summer when inventory is full and there’s no rush.
Uneven Wear Patterns Your Car Is Telling You Something
Look at the tread across the full width of each tire:
- Inside edge worn more than outside? Almost certainly an alignment issue the camber is off. Extremely common after a Halifax winter full of potholes.
- Outside edge worn? Could be alignment, could be underinflation, could be aggressive cornering. Less common but worth noting.
- Cupping or scalloping (a wavy, patchy pattern)? That’s usually a worn shock absorber or strut. The tire is literally bouncing down the road instead of maintaining smooth contact.
- Centre strip worn more than edges? Overinflation. Someone (or a TPMS system) kept the pressure too high all winter.
Uneven wear doesn’t just mean “buy new tires sooner.” It means something on the car caused it, and if you don’t fix the cause, your all-season tires will wear the same way all summer.
Damage Check Cuts, Cracks, Bulges, Embedded Objects
Run your hand around each tire (carefully). Feel for:
- Sidewall bulges: A bulge means internal structural damage, usually from a hard pothole impact. That tire is not safe to store and reinstall. It needs replacing.
- Cuts or slices: Common from debris, curb strikes, or sharp ice chunks. Shallow surface cuts in the tread area are usually cosmetic. Anything deep enough to expose cords, or any cut on the sidewall, means the tire is done.
- Embedded objects: Nails, screws, wire pull it out now. If it held air all winter, it might be repairable. If the puncture is in the sidewall or near the shoulder, it’s not.
- Cracking: Look at the sidewall rubber, especially near the bead. Fine surface cracking (called “weather checking”) is normal on older tires but it gets worse with each season. Deep cracks or rubber that looks dry and chalky? That tire is aging out regardless of tread depth.
Part 2: The All-Season Or Summer Tires Going On
Your warm-weather tires have been sitting in a garage, basement, or storage rack since October. Don’t assume they’re fine just because they were fine when they came off.
Inflation Check Storage Always Loses Pressure
Tires lose pressure sitting in storage. Count on it. Check and inflate to the correct PSI (listed on the driver’s door jamb sticker, not the sidewall of the tire the sidewall number is the maximum, not the target) before or immediately after installation.
Flat Spots
If tires sat in one position all winter without being rotated, they can develop temporary flat spots you’ll feel a mild rhythmic thump at low speed for the first few kilometres. This usually works itself out within 20-30 minutes of driving as the rubber warms and flexes back into shape.
If the thumping persists after a full day of driving, the flat spot may be permanent (more common on performance tires or tires stored in very cold conditions). Rebalancing can help, but if it’s bad, the tire may need replacing.
Age Check Rubber Doesn’t Last Forever
Every tire has a DOT date code stamped on the sidewall. It’s a four-digit number at the end of the DOT sequence: the first two digits are the week of manufacture, the last two are the year. So “2321” means the tire was made in the 23rd week of 2021.
Most tire manufacturers and safety organizations recommend replacing tires that are 6+ years old, regardless of tread depth. Rubber degrades with age, UV exposure, ozone, temperature cycling and an old tire can look perfectly fine while having significantly reduced grip, especially in wet conditions.
We see 8- and 9-year-old tires come into the shop with decent tread depth and owners who think they’re good. The rubber tells a different story.
Visual Check Same As The Winter Tires
Bulges, cuts, cracking, embedded objects. Same drill. If anything looks off, it’s better to know now than after installation.
Part 3: The Car Itself – What Winter Did Underneath?
This is the part most people skip, and it’s arguably the most important. Your wheels are off during a changeover. That’s a free window to look at the brakes, suspension, and steering components that took a beating all winter.
Brakes Since The Wheels Are Already Off
With the wheel removed, you’re staring right at the brake rotor and caliper. It takes 30 seconds to check:
- Pad thickness: If you can see the pad material through the caliper window and it’s getting thin (below ~3-4 mm), start planning a brake job. You don’t need to do it today, but you don’t want to find out in July.
- Rotor condition: Look for deep grooves, scoring, or a lip around the edge. Some light rust on rotors after winter is cosmetic and normally it wears off in the first few stops. Deep scoring means the rotor is wearing and may need resurfacing or replacement with the next brake service.
- Brake lines and hoses: Visual check for leaks, corrosion, or bulging rubber hoses. Halifax salt is brutal on brake lines, and a corroded line can fail suddenly.
Alignment The Pothole Question
We covered this in our spring tire-off guide, but it bears repeating: Halifax potholes create more alignment problems per capita than anywhere we’ve seen. The freeze-thaw cycle leaves the roads looking like a battlefield by April.
Signs you need an alignment check:
- Vehicle pulls to one side on a flat, straight road
- Steering wheel is off-centre when driving straight
- Uneven tire wear on either set of tires
- You hit a particularly nasty pothole (or a few) and the car “felt different” afterward
An alignment is typically one of the cheaper services at any shop. Ignoring it will eat a set of tires in a single summer which is far more expensive.
Suspension Components – The Stuff That Absorbs The Hits
While the wheels are off, a good technician will give the suspension a quick once-over:
- Shocks/struts: Push down hard on each corner of the car. If it bounces more than once or twice before settling, the shocks may be worn. Also look for oil leaking from the shock body that’s a definitive sign of failure.
- Control arm bushings: Cracked or deteriorated rubber bushings cause clunking noises over bumps and sloppy handling. Salt accelerates their deterioration.
- Tie rod ends and ball joints: These are the critical steering and suspension pivot points. Any significant play or looseness is a safety concern that shows up in your MVI too.
- Sway bar links: The most commonly broken suspension component we see after winter. If you hear a metallic rattle or clunk going over bumps, a broken sway bar end link is the most likely suspect.
Wheel And Rim Inspection
Check each rim for:
- Bends or dents: Run your finger around the inside and outside lip. A bent rim from a pothole can cause a slow leak that drives you crazy all summer.
- Corrosion: Salt does a number on steel rims especially. Heavy flaking or pitting can affect the bead seal where the tire meets the rim, causing slow pressure loss.
- Lug nut seats: Make sure the lug nut mating surfaces on the rim aren’t damaged or built up with corrosion. Proper torque depends on clean contact.
Part 4: Fluids, Battery, And Under-Hood
While we’re at it spring is a great time for a quick under-hood sanity check:
- Coolant level and condition: Should be between the min/max marks, and the fluid should look clean (usually green, orange, or pink depending on the type). Murky or rusty coolant means a flush is overdue.
- Brake fluid: Check the reservoir. Low level can mean worn pads (normal) or a leak (not normal).
- Battery: Cold weather is hardest on batteries. If your battery struggles through January starts, it’s not going to magically get stronger. Spring is the ideal time to test it and replace proactively rather than getting stranded in a parking lot.
- Wiper blades: Winter destroys wiper blades. If they’re streaking, chattering, or missing chunks of rubber, replace them now.
The “Spring Checklist” At a Glance
For quick reference, here’s the whole list condensed:
Winter Tires (Going Into Storage):
- Tread depth measurement
- Uneven wear pattern check
- Sidewall bulge/crack/damage inspection
- Embedded object removal
- Clean salt and grime before storage
All-Season Tires (Going On The Car):
- Inflate to correct pressure
- Check for flat spots
- Verify tire age (DOT date code)
- Damage and condition inspection
The Car:
- Brake pad thickness and rotor condition
- Alignment check (especially after pothole season)
- Suspension components: shocks, bushings, links
- Wheel/rim condition
- Under-hood fluids and battery
Why This Matters More Than You Think?
The thing about winter damage is that it’s cumulative and silent. A slightly bent rim, a marginally worn tie rod end, an alignment that’s off by half a degree none of these will make your car undrivable today. But each one quietly accelerates wear on something else. By midsummer, you’ve got uneven tire wear, a vibration at speed, and a suspension clunk that “came out of nowhere.”
It didn’t come out of nowhere. It came out in February.
The spring changeover is the one time a year your wheels are already off and a technician (or you) can see everything clearly. Don’t waste that window. It’s the perfect moment to inspect brake pads, rotors, suspension components, and check for uneven wear before small issues turn expensive. If you’re booking a tire change Halifax, use that appointment as a full visual health check for your vehicle, not just a seasonal swap.
What Dial-A-Tire Includes In A Spring Changeover?
When you bring your car to us for a spring swap, here’s what we do as standard:
- Swap and torque to spec (never impacted on, always torqued properly)
- Balance – if mounting tires on wheels
- Inflate to correct PSI
- TPMS check
- Tread depth and condition check on both sets
- Quick visual brake and suspension inspection
- Note anything that needs attention and let you know before proceeding with any additional work
Most “on-rim” spring changeovers are done in about 20 minutes fast, but never rushed. Call us or book online and we’ll get you sorted for summer.
FAQ’s
Q.1 What Should I Check During A Spring Tire Swap?
Ans: Both sets of tires (tread depth, damage, age), brakes (pads and rotors), wheel alignment, suspension components, rim condition, tire pressure, and under-hood fluids. The spring changeover is the ideal time because the wheels are already off.
Q.2 How Do I Know If I Need An Alignment After Winter?
Ans: If the vehicle pulls to one side, the steering wheel sits off-centre, or you see uneven tire wear, you likely need an alignment. After a Halifax winter full of potholes, it’s a smart precaution even without obvious symptoms.
Q.3 Should I Replace Winter Tires That Still Have Some Tread?
Ans: If they’re below about 5/32″ (4 mm), they’ve lost most of their winter effectiveness the siping needs depth to work. Plan on replacing them before next season, ideally in summer when there’s no rush.
Q.4 How Old Is Too Old For Tires?
Ans: Most manufacturers recommend replacing tires older than 6 years, regardless of tread depth. Check the DOT date code on the sidewall the last four digits indicate the week and year of manufacture.
Q.5 How Long Does A Spring Changeover Take At Dial-A-Tire?
Ans: About 20 minutes for most vehicles, including a condition check on both sets of tires and a visual brake inspection.